


EuropeID Help Center

Customer Support Information
Hosting — FAQ - How to set up your first website in Plesk?
How to set up your first website in Plesk?
When your hosting subscription has been created, also your domain is automatically being added in Plesk control panel. We can call this domain name the first domain of your subscription.
To start using your website you should have your website’s content uploaded. You could use either professional Webmaster service or create your website by using one of our available applications in Plesk’s 1-Click application installer – in this case take a look at the following steps.
First Step – Choose suitable application
Log in to your Plesk account.
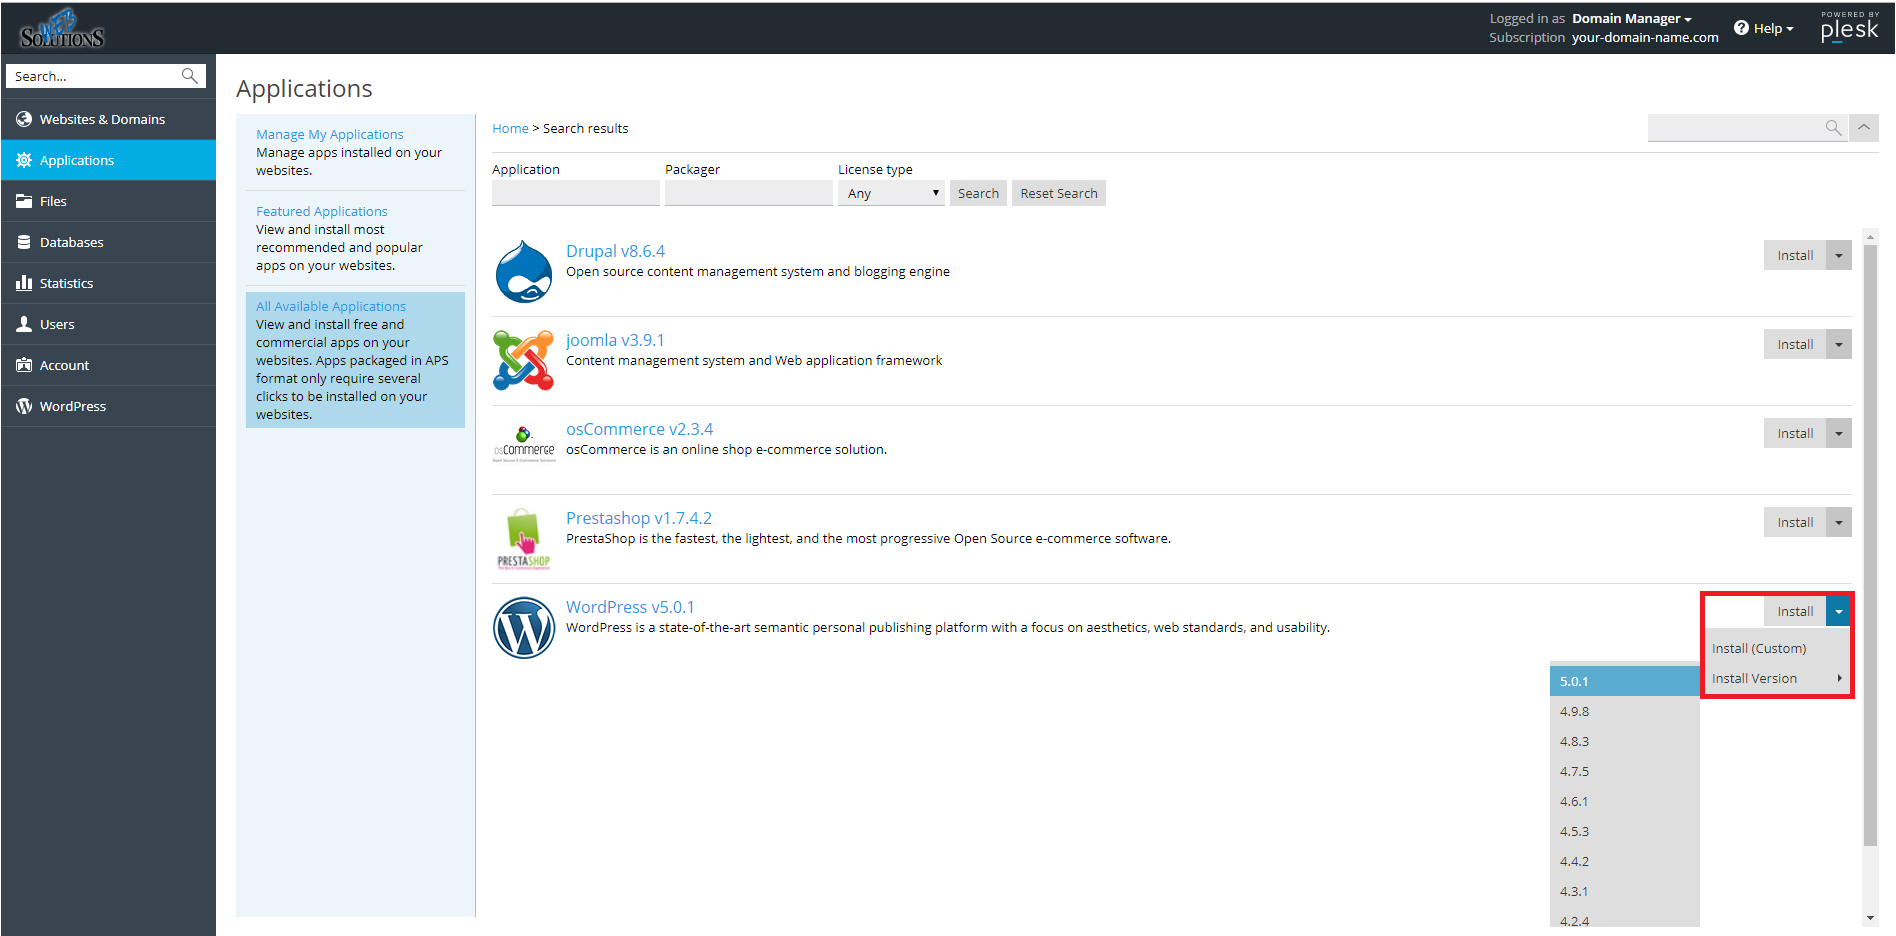
Go to card Applications and press All Available Applications, where you would find the list of all the applications available in Plesk, all with 1-Click installation. WordPress is the most popular web application that allows you to create any type of website – from a blog to an online store.

Second step – Installation
Press Install to get the newest app version.
If you want to set WordPress to custom location, manually set the name of WordPress database or change other settings – choose Install (Custom).
To accomplish the installation you have to set some mandatory settings.
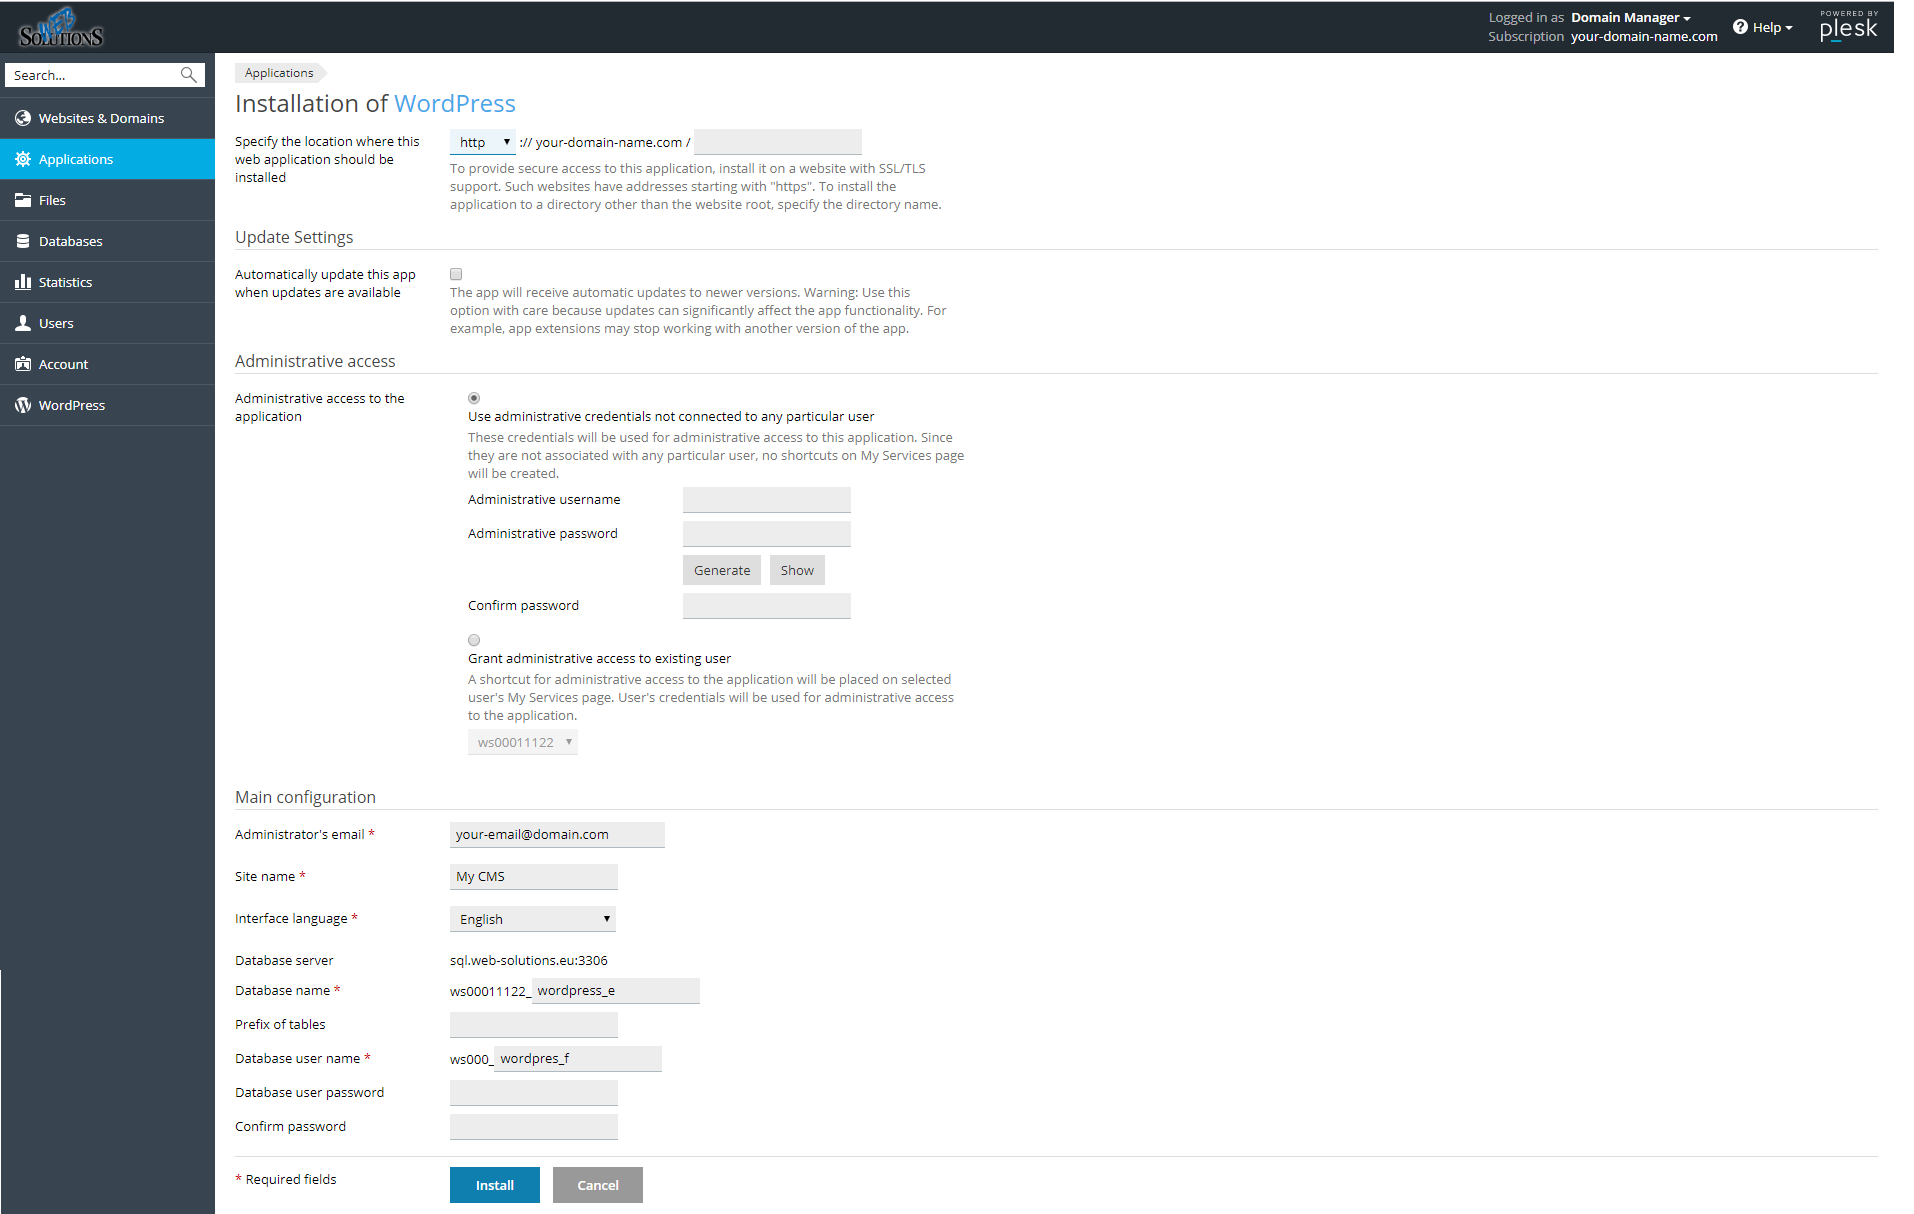
Location of application
- Select whether you want to use HTTP or HTTPS protocol.
HTTPS protocol supported with SSL/TLS certificate provides better security in comparison to HTTP.
There are different types of SSL certificates. You could use Plesk’s free Let’s Encrypt certificate solution, or choose one of the offered certificates from our SSL Shop.
- Add extension if you want to install app in custom directory.
Update settings
You can choose to have automatic updates. Consider, that some updates might affect your website functionalities.
Administrative access
Select one option:
- “Use administrative credentials not connected to any particular user” to create new administrator account
- Or “Grant administrative access to existing user” so you can log in to app with the same credentials as to Plesk panel for selected user
Main configuration
Administrator’s email – where all notifications will be sent
Site name – set name for your site
Interface language – chosen language will be set for the application backend control panel
Database name – set custom database name or choose default one
Prefix of table – optionally choose prefix that will appear at each table in this database
Database user name – set custom user name or choose default one
Database password – optionally you can set password (recommended)
Tap Install to finish installation.
Third Step – Write content
After you accomplished installation you can start creating your website’s content using chosen application.
Go to Websites & Domains card, WordPress plugin should be already visible over there. Press Log to button, which will redirect you to the WordPress backend Control Panel.
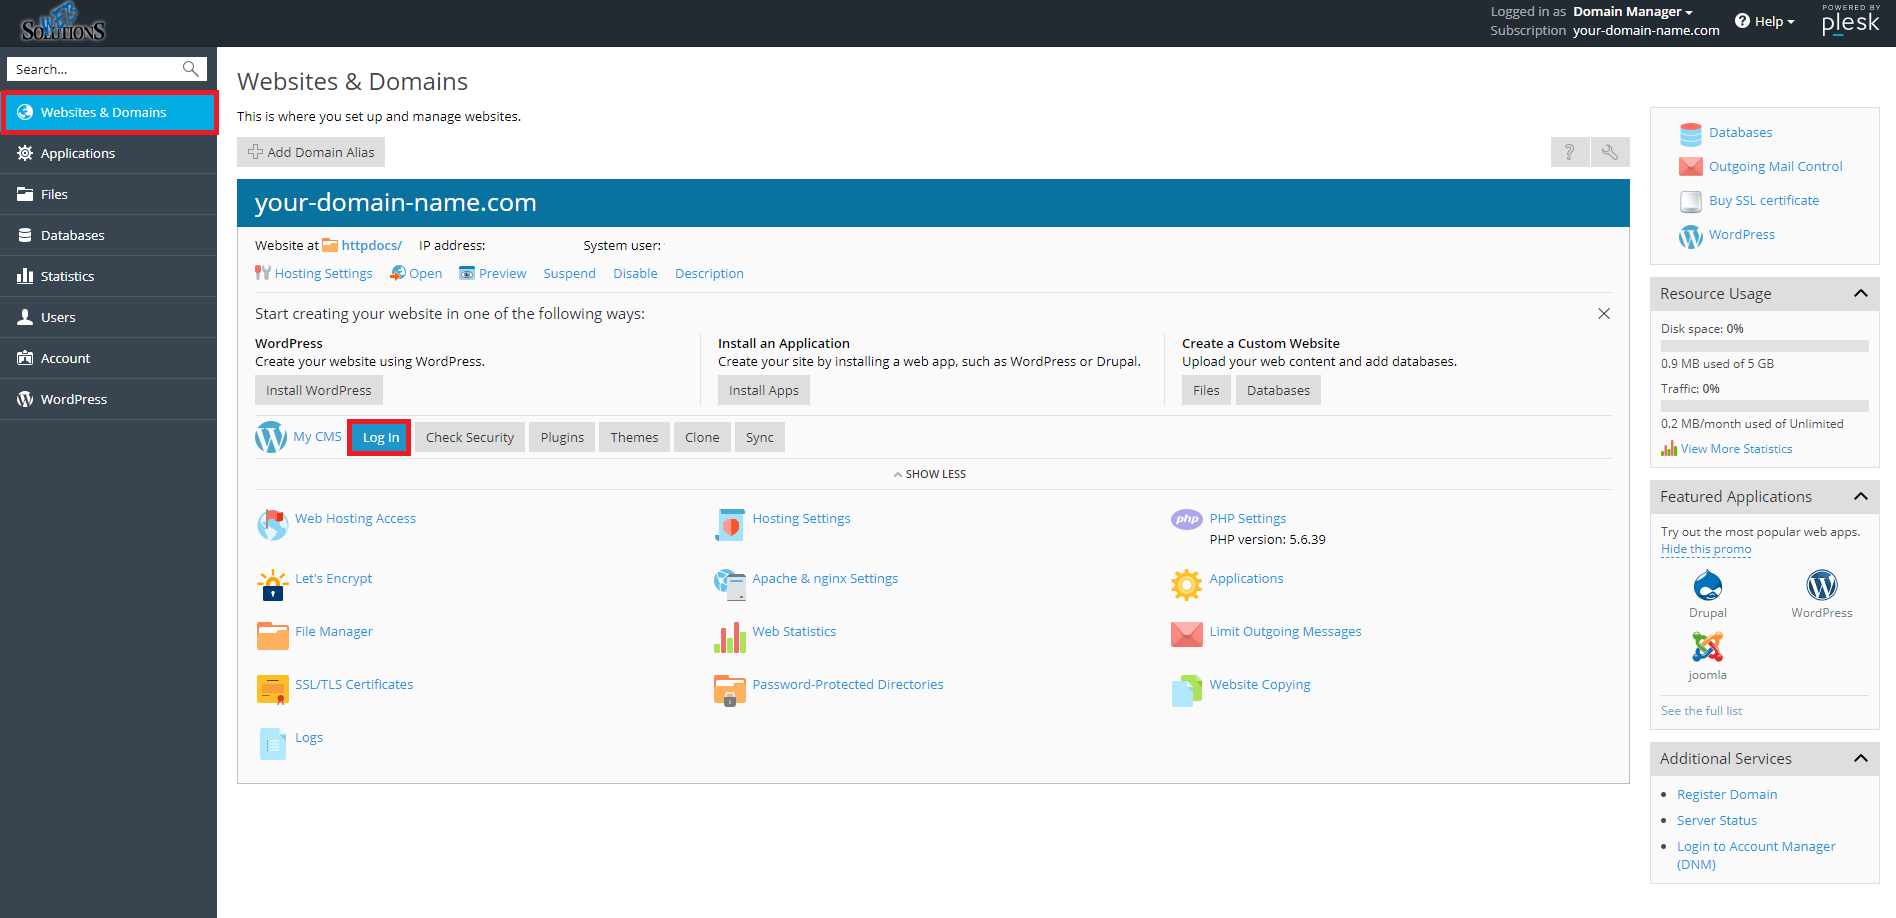
Alternatively you can go to your website adding suffix ‘/wp-admin/’ for example ‘www.your- domain-name.com/wp-admin/’.